
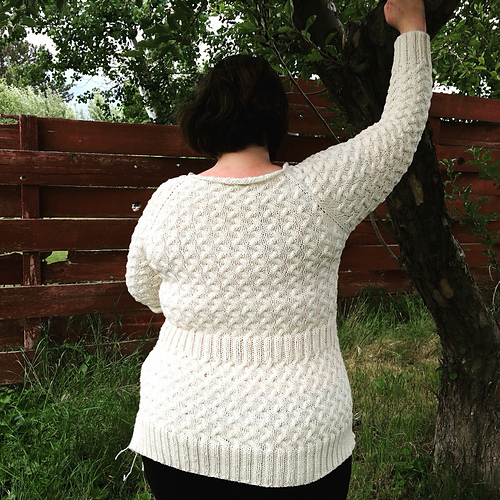
Rocky Coast Cardigan
Mods.
As with many others, I made some modifications. The perk of making our own garments is that we can tailor them to our own needs.
Better fitting back and shoulders
I moved 6 stitches on each side of the back to the sleeves, and increased at the front every RS row 6 times.
I intended to follow the mod from kategafnonosborn’s Rocky Coast Cardigan, but I misread it and increased every RS row instead. This made for a round front corner that I currently like, but I reserve the right to change my mind when I work the collar. Here are her original instructions: “Worked an increase on each end of the fronts every 6 rows until each front had an additional 6 sts – or one cable repeat. This added an additional inch and a half to each side.”
I also added the wider sleeve and yoke increases listed in the errata. Somehow my stitch count didn’t match up so I only increased by 10 sts at the underarm.
Curvy Girl Hips
I’ve accepted that boxy shapes don’t work on my body. My wide hips don’t tolerate it. I wanted to add about 4 – 6 inches for the hips.
When joining the body after putting the sleeves on holders, I added stitch markers on each edge of the back piece and worked 8 inches on the body ending with row 2 of the stitch pattern.
The plan is to continue working the two front and sides in pattern while switching to double ribbing on the back between the stitch markers:
Next Row (pattern row 3): K to stitch marker, slip marker, P2, K2 to last two stitches before marker, P2. Slip marker, K to end.
Work as established for two pattern repeats (or desired height of waist shaping) ending with pattern row 2.
Next row (pattern row 3): Knit to stitch marker. Slip marker. kfb, k4 to last stitch before stitch marker, kfb. Slip marker, knit to end. (18 stitches increased).
Continue in pattern until desired body length has been reached.
Sleeves
Pick up 14 stitches, from the underarm placing beginning of round marker at the center of these stitches.
Beginning with pattern row 7, knit as established for 3 inches.
Work Decrease round every 4 rounds (cable rounds), 19 times.
Work to 16 inches from underarm.
Work 20 rounds of ribbing.
Bind off loosely.
My Favorite Bind Off
I apparently use a modified Decrease Bind Off method. I love how it is a stretchy bind off that is loose enough for sleeves, collars and sock legs without flaring out as so many stretchy bind-offs do.
To start:
Work the first stitch.
If next stitch on the left needle is a purl:
P1, Slip left needle through the two stitches on the right needle to the front, P2tog.
If next stitch on the left needle is a knit:
K1, Slip left needle through the two stitches on the right needle to the back, K2tog twice. (one for each purl stitch in double ribbing)
If working flat, repeat to end.
If working in the round, repeat to last stitch. Work my favorite version of TECHKnitting’s binding off circular knits.


